Procedural Materials in Blender
- Introduction to Procedural Materials
- Understanding Blender's Cycles Engine
- Basics of Procedural Texturing
- Advanced Procedural Texturing
- Shading Basics
- Procedural Shading Techniques
- Practical Procedural Materials
- Realistic Lighting and Shading
- Advanced Techniques
- Environment Shaders in Cycles
- Procedural Effects
- Rendering and Compositing
- Creating a Final Project
Procedural Shading Techniques
Refining Shader Inputs for Realistic Results
Type of hardware in a graphical processing unit (GPU).
In the world of 3D modeling and rendering, the devil is often in the details. One of the most critical aspects of creating realistic materials is refining shader inputs. This process involves adjusting various parameters within your shaders to achieve the desired look and feel for your materials. This article will guide you through the process of refining shader inputs using procedural textures in Blender's Shader Editor.
Understanding Shader Inputs
Shader inputs are the parameters that control how a shader behaves. These can include things like color, roughness, metallic, specular, and many others. Each of these inputs can drastically change the appearance of your material, so it's essential to understand how they work.
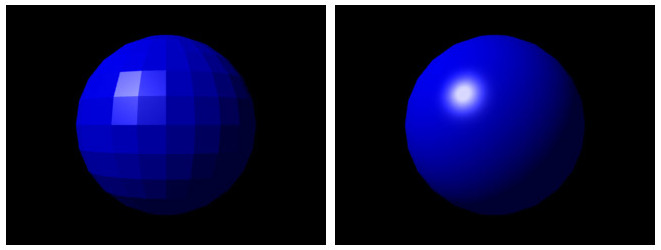
For example, the roughness input controls how rough or smooth a material appears. A high roughness value will result in a matte finish, while a low value will create a glossy, reflective surface. Similarly, the metallic input determines how metallic a material appears, with higher values creating a more metallic look.
Refining Shader Inputs with Procedural Textures
Procedural textures can be a powerful tool for refining shader inputs. By using procedural textures, you can create complex, detailed materials without the need for image textures.
To refine shader inputs with procedural textures, you'll need to connect your procedural texture to the desired shader input. For example, you might connect a Noise Texture to the roughness input of a Principled BSDF shader to create a material with varying roughness.
The key to refining shader inputs with procedural textures is experimentation. Try different combinations of procedural textures and shader inputs to see what effects you can create. Remember, small adjustments can often make a big difference, so don't be afraid to tweak your settings until you get the look you're after.
Practical Examples
Let's look at a practical example of refining shader inputs with procedural textures. Suppose we want to create a rusty metal material. We could start by using a Musgrave Texture to create the base color of the rust. We could then use a Noise Texture to add some variation to the roughness, making some areas of the rust smoother than others. Finally, we could use a Voronoi Texture to add some small, detailed bumps to the surface of the rust, giving it a more realistic texture.
By refining the shader inputs in this way, we can create a complex, realistic rust material entirely from procedural textures.
In conclusion, refining shader inputs is a crucial step in creating realistic materials in Blender. By understanding how shader inputs work and how to refine them with procedural textures, you can create a wide range of complex, realistic materials for your 3D models.